Adways Advent Calendar 2019 14日目の記事です。
http://blog.engineer.adways.net/entry/advent_calendar_2019
こんにちは、swfzです。
先日 Angularでの静的サイトジェネレーターscullyが公開されました
ReactだとGatsby、VueだとGridsomeなど、静的サイトジェネレーターと言われる部類のものがありましたがAngularは(僕が観測している範囲では)今までありませんでした
個人的に待望だったのでまだ変更等ありそうですが一足早く使ってみたいと思います
チュートリアル動画は下記にあります
Introducing Scully: Angular + JAMStack - YouTube
JAMstackとは
JAMstack | JavaScript, APIs, and Markup
2018年あたりに提唱された概念で、クライアントサイドJavaScript、再利用可能なAPI、マークアップの3つを取り入れて構築されたウェブサイトのことを言います
超ざっくり言ってしまえば静的サイトジェネレーターで作った静的サイトを何らかのホスティングサービス上で公開してればJAMstackです
Scully
ScullyでやっていることはREADMEを見ると
- アプリの各ページをScullyでHTML、CSSに事前レンダリングしHTMLファイルへ保存する
- 事前レンダリングもするがAngularで記述されたSPAの機能も使うことができる
という感じのようです
動かしてみる
tutorialに沿って動かしてみます
プロジェクト作成
ScullyはAngular v9からの対応です、現在まだv9はリリースされていないので@nextでインストールします
npm install -g @angular/cli@next
ng g scully-sample
scullyの追加
Angular関連のライブラリ(AngularMaterial, CDKなど)を入れる場合はng addを使ってインストールできる場合があります
ng addでインストールすると既存のモジュールや設定ファイルをよしなに変更してくれます
Scullyも対応しているので入れてみます
ng add @scullyio/init
scully.config.jsが生成されました
- scully.config.js
exports.config = {
  projectRoot: "./src/app",
  routes: {
  }
};
このroutesに諸々設定を書いていくことで静的ページを生成できるようにするようです
ビルドしてみる
現段階で一度ビルドしてみます
ng build
npm run scully
ng buildでAngularアプリケーションのビルドを行います、成果物はdist/{project_name}へ生成されます
npm run scullyでScullyのビルドを行います、成果物はdist/staticへ生成されます
使ってる側からは見えませんが内部的にはAngularでビルドした成果物に対してサーバを立ち上げてchromiumでクローリングしてファイルの生成をしているようです
なのでscullyコマンド実行中はそれなりに時間が掛かってます
dist/staticから成果物をserveしてみます
cd dist/static
python -m http.server 8080
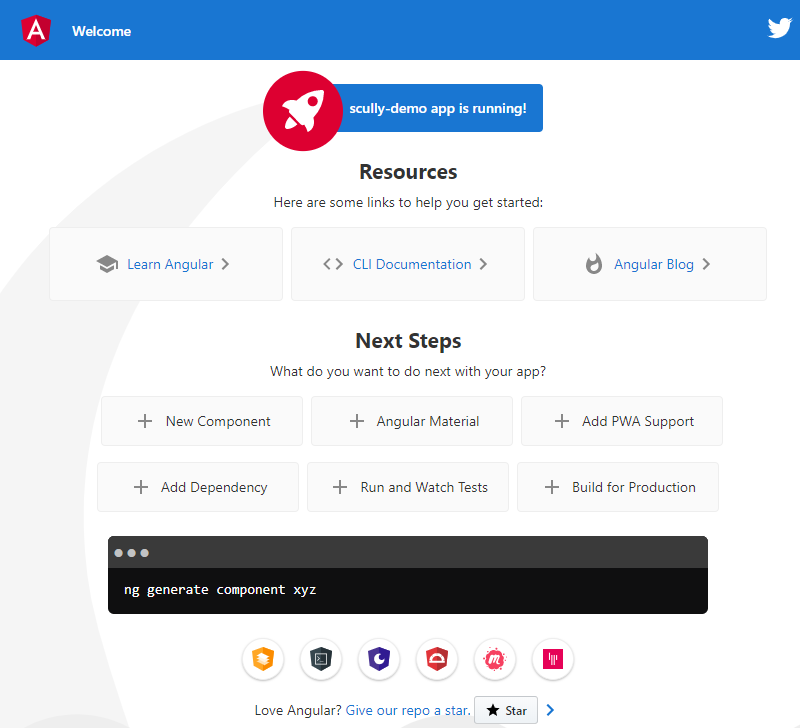
いつもどおりのAngularの最初の画面ですね
APIから静的ファイルを生成する
APIから静的ファイルを生成してみます
準備
事前にuserコンポーネントを作成しておきます
ng g m user --moudle --routing --route
ng g c user --module
- src/app/user/user.component.ts
export class UserComponent implements OnInit {
  userId$ = this.route.params.pipe(
    pluck('userId')
  );
  constructor(private route: ActivatedRoute) { }

  ngOnInit() {
  }
}
- src/app/user/user.component.html
<p>UserID: {{ userId$ | async }}</p>
- src/app/app-routing.module.ts
const routes: Routes = [
  {path: 'users', loadChildren: () => import('./user/user.module').then(mod => mod.UserModule)}
];

userIdのパラメーターを受け取れるようにしました
APIからルートを自動取得してみる
jsonplaceholderのAPIから自動で静的ファイルを生成します
まずはscullyの設定を修正します
- scully.config.js
exports.config = {
  projectRoot: "./src/app",
  routes: {
    "/users/:userId": {
      type: "json",
      userId: {
        url: 'https://jsonplaceholder.typicode.com/users',
        property: 'id'
      }
    }
  }
};
users/:userIdというパスではこのURLから取得したコンテンツを静的ファイルに吐き出すよう設定しています
実行してみます
$ ng build & npm run scully
Cleaned up /home/vagrant/sandbox/scully-demo/dist/static/ folder.
 ☺   new Angular build imported
started servers in background
servers available
Finding all routes in application.
Pull in data to create additional routes.
Route list created in files:
      src/assets/scully-routes.json
      /home/vagrant/sandbox/scully-demo/dist/static/assets/scully-routes.json
Route "/users" rendered into file: "/home/vagrant/sandbox/scully-demo/dist/static/users/index.html"
Route "/users/1" rendered into file: "/home/vagrant/sandbox/scully-demo/dist/static/users/1/index.html"
Route "/users/2" rendered into file: "/home/vagrant/sandbox/scully-demo/dist/static/users/2/index.html"
Route "/users/3" rendered into file: "/home/vagrant/sandbox/scully-demo/dist/static/users/3/index.html"
Route "/users/4" rendered into file: "/home/vagrant/sandbox/scully-demo/dist/static/users/4/index.html"
Route "/users/5" rendered into file: "/home/vagrant/sandbox/scully-demo/dist/static/users/5/index.html"
Route "/users/6" rendered into file: "/home/vagrant/sandbox/scully-demo/dist/static/users/6/index.html"
Route "/users/7" rendered into file: "/home/vagrant/sandbox/scully-demo/dist/static/users/7/index.html"
Route "/users/8" rendered into file: "/home/vagrant/sandbox/scully-demo/dist/static/users/8/index.html"
Route "/users/9" rendered into file: "/home/vagrant/sandbox/scully-demo/dist/static/users/9/index.html"
Route "/users/10" rendered into file: "/home/vagrant/sandbox/scully-demo/dist/static/users/10/index.html"
Route list created in files:
      src/assets/scully-routes.json
      /home/vagrant/sandbox/scully-demo/dist/static/assets/scully-routes.json

Generating took 153.07 seconds for 11 pages:
  That is 0.08 pages per second,
  or 13916 milliseconds for each page.
HTMLが生成されました
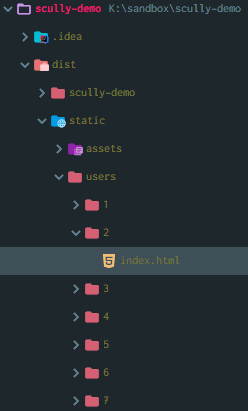
dist/staticでサーブして確認したところAPIへのhttpリクエストは行ってないようです
ルートをリスト化する
scullyコマンドで収集されたルート情報はsrc/assets/scully-routes.jsonとdist/static/assets/scully-routes.jsonに保存されます
[{"route":"/users"},{"route":"/users/1"},{"route":"/users/2"},{"route":"/users/3"},{"route":"/users/4"},{"route":"/users/5"},{"route":"/users/6"},{"route":"/users/7"},{"route":"/users/8"},{"route":"/users/9"},{"route":"/users/10"}]
これをもとにAngularはルート情報を扱うようです
ルートコンポーネントでリンクのリストを作ってみます
- app.component.html
<h1>{{ title }}</h1>
<hr>
<router-outlet></router-outlet>
<hr>
<footer>
  <li *ngFor="let route of scully.available$ | async">
    <a [routerLink]="route.route">{{route.title || route.route}}</a>
  </li>
</footer>
- app.component.ts
export class AppComponent {
  constructor(private idle: IdleMonitorService, public scully: ScullyRoutesService) { }

  title = 'Hello Scully!';
}
ScullyRoutesServiceにルートの情報が入っているのでそれをもとにリンクを作りました
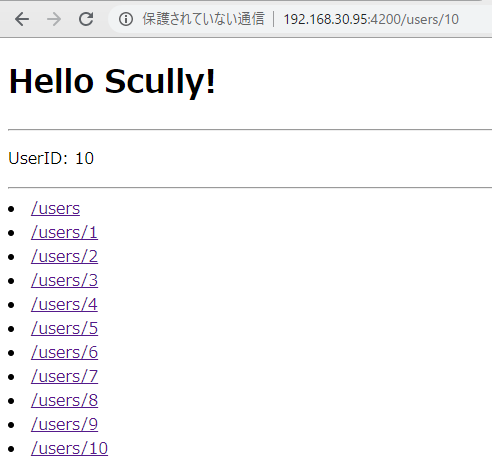
APIからの生成はいったんここで終わります
markdownからブログを生成してみる
次はブログを作ってみます
ブログの初期化
Scullyにコマンドが用意されていて下記コマンドでブログ環境を作成できます
ng g @sucullyio/init:blog
    ✅ 12-19-2019-blog file created
    ✅️ Update scully.config.js
CREATE y (98 bytes)
CREATE src/app/blog/blog-routing.module.ts (369 bytes)
CREATE src/app/blog/blog.component.css (157 bytes)
CREATE src/app/blog/blog.component.html (160 bytes)
CREATE src/app/blog/blog.component.spec.ts (639 bytes)
CREATE src/app/blog/blog.component.ts (508 bytes)
CREATE src/app/blog/blog.module.ts (393 bytes)
UPDATE scully.config.js (326 bytes)
UPDATE src/app/app-routing.module.ts (437 bytes)
下記コマンド実行結果の差分です
diff --git a/scully.config.js b/scully.config.js
index 8934a32..e93734e 100644
--- a/scully.config.js
+++ b/scully.config.js
@@ -1,6 +1,12 @@
 exports.config = {
   projectRoot: "./src/app",
   routes: {
+    '/blog/:slug': {
+      type: 'contentFolder',
+      slug: {
+        folder: "./blog"
+      }
+    },
     "/users/:userId": {
       type: "json",
       userId: {
diff --git a/src/app/app-routing.module.ts b/src/app/app-routing.module.ts
index 691fd8c..8071c4c 100644
--- a/src/app/app-routing.module.ts
+++ b/src/app/app-routing.module.ts
@@ -3,7 +3,8 @@ import { Routes, RouterModule } from '@angular/router';


 const routes: Routes = [
-  {path: 'users', loadChildren: () => import('./user/user.module').then(mod => mod.UserModule)}
+  {path: 'users', loadChildren: () => import('./user/user.module').then(mod => mod.UserModule)},
+  { path: 'blog', loadChildren: () => import('./blog/blog.module').then(m => m.BlogModule) }
 ];

 @NgModule({
blog関連のコンポーネントやroutingの設定が変更されました
blogディレクトリに最初のmarkdownファイルも生成されています
再度scullyコマンドでルート情報を更新します
$ ng build && npm run scully
.....
.....
.....
Route "/users/8" rendered into file: "/home/vagrant/sandbox/scully-demo/dist/static/users/8/index.html"
Route "/users/9" rendered into file: "/home/vagrant/sandbox/scully-demo/dist/static/users/9/index.html"
Route "/users/10" rendered into file: "/home/vagrant/sandbox/scully-demo/dist/static/users/10/index.html"
Route "/blog/12-19-2019-blog" rendered into file: "/home/vagrant/sandbox/scully-demo/dist/static/blog/12-19-2019-blog/index.html"
markdownファイルもルートに追加されました
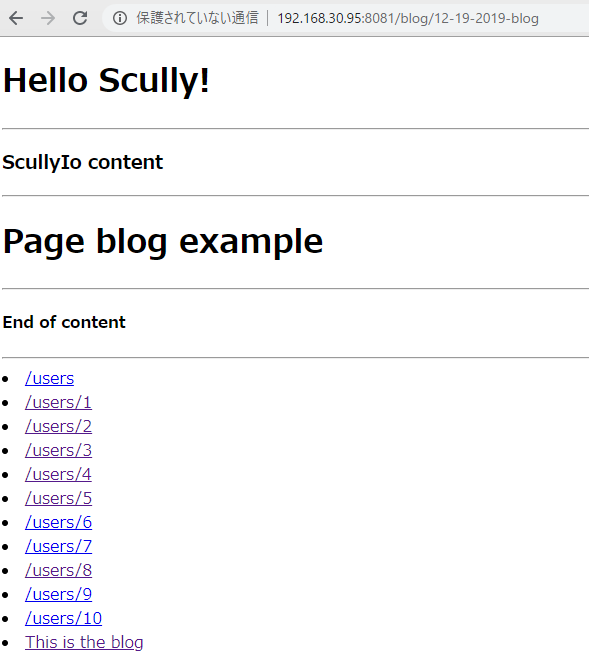
APIからのデータとmarkdown両方のルートが一覧に出てますね
記事の追加
記事の追加をしてみます
$ npx ng g @scullyio/init:post --name="12-20-2019-blog"
    ✅️Blog 12-20-2019-blog file created
CREATE blog/12-20-2019-blog.md (95 bytes)
nameオプションで指定したファイルが生成されます
適当に中身を書いてscullyコマンドを叩いてみます

記事が追加されましたね
メタデータを追加してみる
Scullyがmarkdownから読み込むデータにメタデータも入っているので、ここに項目を追加すればルート情報と合わせて情報を付加できます
- blog/12-19-2019-blog.md
---
title: This is the blog
description: blog description
publish: false
category: demo
---

# Page blog example
上記のようにデフォルトの状態からcategoryという項目を追加してみました
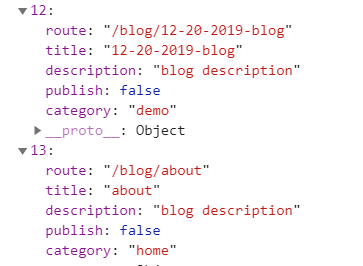
しっかり取れていますね

リストへの表示もできました
該当リンクをクリックして記事へ飛ぶと下記のようになりました
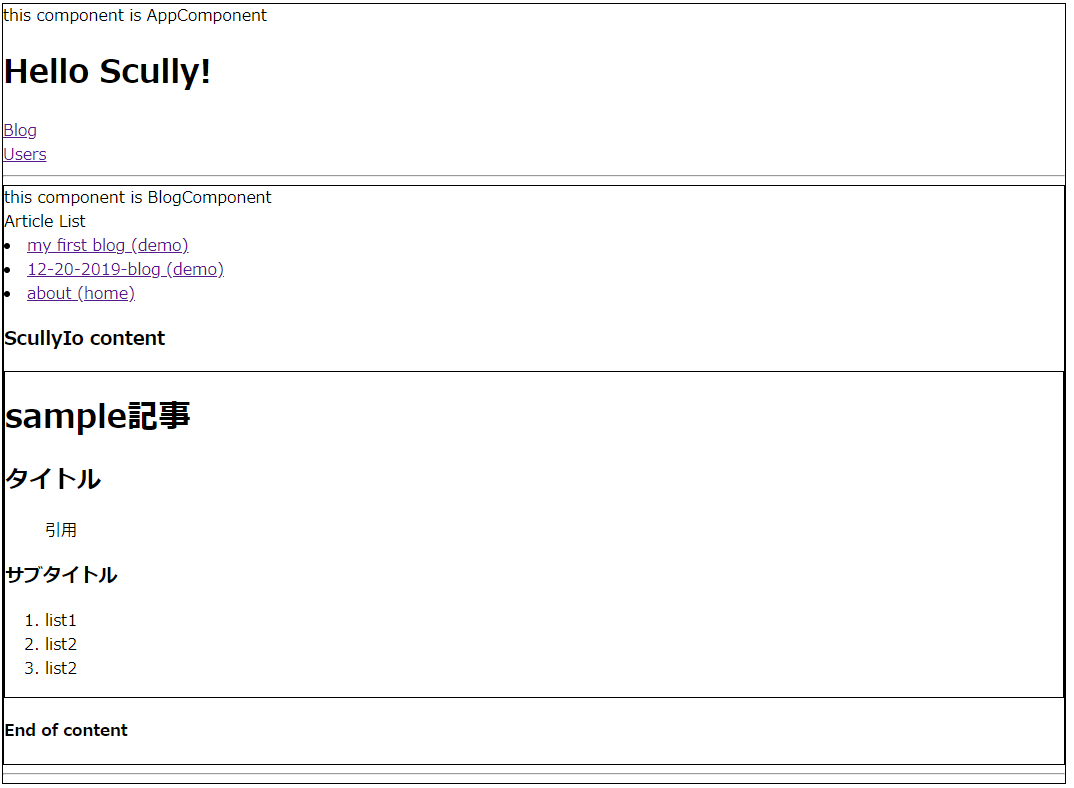
最後にangular-materialを入れてサクッとおしゃれに見えるようにしました

とたんにそれっぽくなった気がします
まとめ
Angularでの静的サイトジェネレーターScullyを触ってみました
時間の都合上本記事で踏み込んで使い込むところまでできませんでしたが年明けにAngular v9がリリース予定なので折をみてもう一度触ってみたいと思います
まだ発表されたばかりということもありドキュメントが揃ってなかったり使いづらいなと思う部分はあるもののウォッチしていこうと思いました
最後にサンプルを動かすのに使ったリポジトリを置いておきます
現場からは以上です
次は内田さんの記事です。
http://blog.engineer.adways.net/entry/advent_calendar_2019/15